All Word documents contain styles, even without you manually applying one to a paragraph. When you open a new blank document it is based on the Normal style.
Microsoft Word will show you which style you are using in each paragraph in your document. I find it very useful when editing a document because then I can see if the appropriate styles have been used. I recommend that all my students use the Style Pane so they know at a glance if they have used the right style. This can be especially helpful when you are troubleshooting a document as well.
Follow the steps below to learn how:
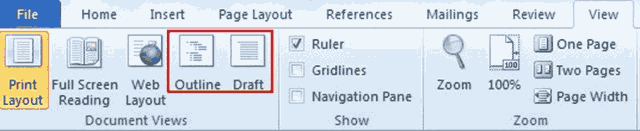
- On the View tab of your Ribbon, in the Document Views group, select either Outline or Draft.
- Click on File to go the Backstage View.
- From the drop-down menu, select Options.
- In the left-hand pane, select Advanced.
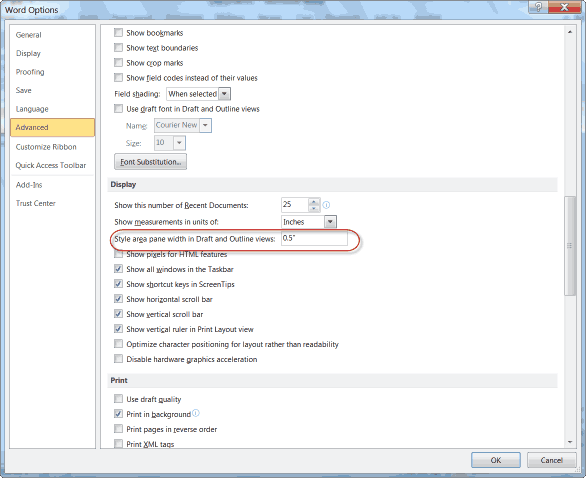
- Scroll down until you see Display.
- To the right of Display, you will see Style area pane width in Draft and Outline view.
- Key in the inches or centimeters width you would like your Style Pane to be.
- A good place to start is 0.5″ as you can always use the drag handle to make it larger if you like later.
- Now click OK to return to your document.
- Select Draft or Outline view using the directions above.
- You will note that the style for each paragraph is shown in the Style area.
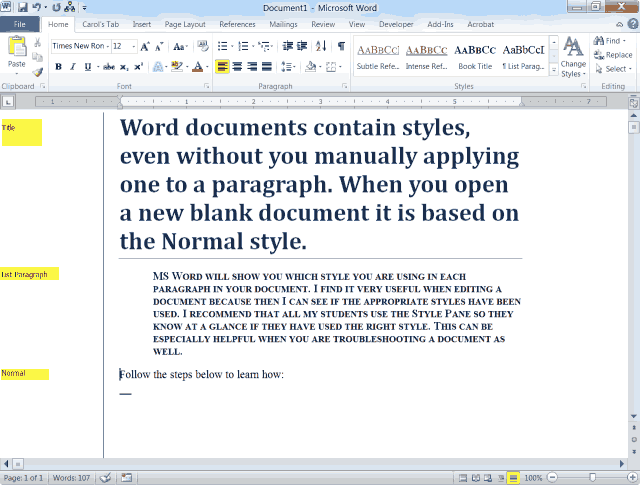
You can see from the screenshot above, there is a black vertical line between the Style pane and your text. If you want more space you can simply select the black line and drag it to the left to make it are smaller or to close the Style pane completely. To make it larger, click and drag to the right.