![]() PowerPoint 2010 gives you the option of creating your own master slides, meaning you can add or change elements and formatting within your presentations.
PowerPoint 2010 gives you the option of creating your own master slides, meaning you can add or change elements and formatting within your presentations.
A slide master is a special slide that you put to work behind the scenes in PowerPoint that specifies how slides appear all the way through your presentation. Once you make a change to a slide master, those changes are applied universally to your presentation. It is a part of a template that stores information by using placeholders. You can use multiple slide masters within your presentation or just a single one that contains multiple layouts.
Follow the steps below to learn about the slide master:
- In the View tab of your Ribbon, in the Master Views group, click on Slide Master. Opening this will allow you to change the design and layout of your master slides.
- A new slide master will appear. Note that the labels include Master so you know you are working on the slide master.
- Your Ribbon now changes to the Slide Master tab, giving you all the tools you will need to work with your slide master.

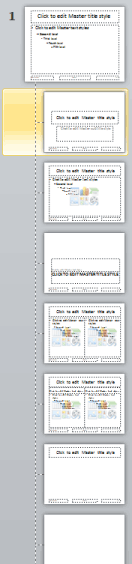
- On the left you will see a pane which is called the thumbnail pane and it shows all the layouts within the default slide master that are provided to you in PowerPoint.The slide master is the large slide image at the top and the layouts are displayed below the slide master.
- You are now ready to insert a new placeholder. For instance, if you wanted to add a placeholder for an image, you would start by selecting a slide master layout.
- Next, you would click the arrow at the bottom of the Insert Placeholder button in the Master Layout group.
A menu displays showing various options, including Content, Text, Picture, and Chart. For our purposes, we will select the Picture menu item. - Drag your cursor to the location on your slide where you would like your image to appear. You can also shift-click on your slide to insert your placeholder.
- Once you have the correct position, you can resize your placeholder by placing your cursor at the corner or on the edge and dragging to enlarge to the size of your choosing.
- You can make other adjustments or insert additional placeholders to your slide master as you wish.
- You can then save your new slide master using File | Save As or CTRL + S and selecting the PowerPoint Template file type.
Thanks, nice article. Bookmarked