
Clean all drives with a single click
The Disk Cleanup Tool that comes bundled with Windows Operating Systems works just fine to free up some disk space. You can use it to remove Temporary Files, Service Pack Backup Files, and a myriad of other clutter that eventually builds up over time. You can even remove all but the most recent System Restore Point.
This is great if you have only a couple of hard drives and/or partitions to deal with. My eccentric ways have resulted in my having 10 partitions spread over 4 physical drives. Wouldn’t it be nice to click one icon and all of them would magically be cleaned? Here’s how…
The Mysterious Command Box
Before we were spoiled with the GUI (pronounced ‘gooey’ and stands for Graphical User Interface) we had DOS. That stands for Disk Operating System and is completely command-line driven. That means if you ever wanted your computer to do anything you had to type in an instruction, or command if you prefer. That was a far cry from the point and click interface we have all grown so familiar with.
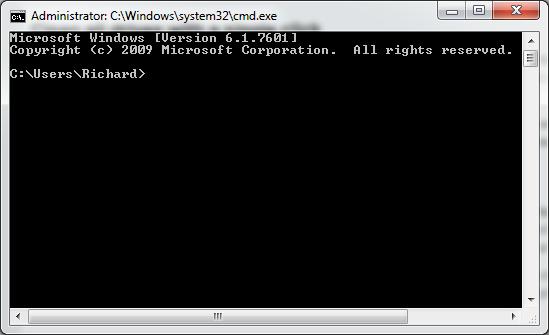
To set up a single-click hard drive clean all we will have to regress a bit. To open a Command Box in Windows 7 just use the Windows Key and tap the R key. In the window that opens type cmd and hit Enter. That should open a Command Box similar to this one. Your User Name may be be different.
By experimenting with this window you will realize that you can re-size it vertically but can not make it wider with your mouse. Let’s try a little hands-on command line writing. There is a command called “Mode”. The syntax for its use is: mode <width>, [<height>]
The square brackets indicate this parameter is optional. Try typing in a mode command like this and see what happens: mode 100
You must always hit the Enter key to invoke a command.
- Tip #1: The F3 key will insert your previously typed command
- Tip #2: The F7 key will offer you a list of your previously typed commands to choose from
- Tip #3: Right-clicking on the Title Bar and choosing Properties will offer a menu of options to choose from
- Tip #4: If you type Help you will be presented with a lengthy list of every command available
- Tip #5: If you type a command followed by /?, as in “mode /?” you will get help specific to that command
The Disk Clean Tool
In a typical scenario, to use the Disk Clean Tool you would go to the Properties sheet for your hard drive, then the Disk Cleanup Button. You will then be presented with several more options and mouse clicks to begin the operation. Then you will be treated to the joyous experience of some more clicks to get back out of the whole convoluted mess. This is totally unacceptable if you have more than a few drives to deal with.
The command that we are interested in is called: cleanmgr Here are the command-line switches and syntax for this command:

Command-line parameters are also called switches; that’s probably because they turn things on and off. Anyway, the switches we will be using are /sageset and /sagerun. You will notice that each of these switches requires a parameter of its own. In each case it expects a number – indicated by the letter ‘n‘. Pay attention to the colon between the switch and the number.
Both of these switches will accept any number in the range of 0-65535 for a total of 65536 possible values. If you can think of a reason to set up that many different profiles you are a much more clever person than I. Fact is, I use only 1.
How It Works
This is what we’re going to do. First we’re going to tell Windows to set up a disk cleaning profile. We’ll do that with the /sageset switch.
Then we’re going to actually run that profile with the /sagerun switch. Make sense?
Create your profile
In the Command Box type this: cleanmgr /sageset:1
Remember to hit the Enter key after a command or you’ll be waiting for something to happen for a very long time. I chose number 1 for this exercise.
- Tip: Pay very close attention to all the spaces. The computer sees spaces as characters. Don’t ignore them. The computer doesn’t
Once you hit Enter you will be shown a window like this:

Once you have checked the boxes and are happy with your choices click the OK button. It will seem as though nothing happened. But in the background Windows has made a record of your choices in a profile associated with the number you chose for the /sageset switch. In our example that number was 1.
Run Your Profile
All you have to do now to run this profile is type this in the Command Box: cleanmgr /sagerun:1
This may not seem like much of a time-saver. That would certainly be true if you had to go through these steps every time. Heck! You might have even been able to do it quicker the old-fashioned way. But here’s the trick…
Create a Batch File
Batch files are a seemingly forgotten but very powerful left-over from the DOS days. A Batch file is basically a text file in which you can type in a whole slew of commands to do a variety of things. The computer will read through this set of instructions, one line at time, and process those commands. Hence the name, Batch. They run a batch of commands all in one go.
There are whole books dedicated to the subject of batch files. They can be incredibly flexible and useful tools and are worth a read if you’re interested in that type of thing.
To create the Batch file simply open up Notepad. Do not use a word processor. We need pure text without any formatting instructions hidden in the background.
In Notepad all you have to do now is type in the command you want Windows to process. In our case it is: cleanmgr /sagerun:1
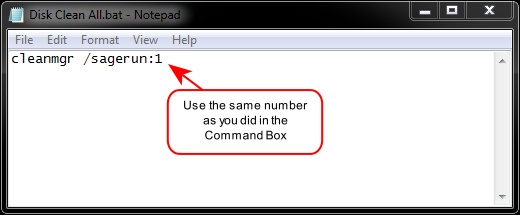
Now, it’s important that you do not save this file as a text file. If you simply save it at this point Notepad will tack on the familiar .txt extension. We don’t want that. We want this file to have a .bat extension. Look in the Title Bar in the above image and you will see how it should look.
Open the File Menu and choose Save As…
Give your new batch file a descriptive name. Something like Disk Clean All, for example. It can be anything you like. Now make sure to change the .txt extension to .bat (for batch). Note: Windows may complain about changing file extensions and how it may no longer work. Ah pooh – just say “Yes”.
You should now have a batch file that will run the cleanmgr command. You run it like you would any other program shortcut that you click. Then stand back and watch the magic happen.
Congratulations! You have written a Batch File!
- Tip: If you need to change anything in your batch file just Right-click it and choose Edit from the context menu
Final Words
I hope this little tutorial has been helpful and that it will save you a whole bunch of time.
Batch files are a powerful tool. You can write simple single-command ones like we just did, all the way up to complex menu systems and much more. There are many more commands available to batch files than are included in the Command Box. We haven’t even scratched the surface.
Good one! Thanks Dave.
There’s a whole lot easier way- just type in disk cleanup in the search line and voila ! you’ve got it, no heed to go into DOS at all.
@ Chris Lafore:
I think the only point of going into DOS was to create the profile for the batch file, which can contain all commands for each and every drive or partition you have; just all combined in a single file. Then, once created, the batchfile can be ran just by clicking.
This then, as opposed to checking the boxes for each of the partitions separately and choosing each cleaning option every time again… and again ,… and then again… and oh, yeah again…… etc which is how it would have to be done through the searchline without the prep..
Going into DOS is a once-off, one-time operation.
Hi John,
You nailed it– thank you 😉
Richard